
With an expanding array of Lidar technology at hand, mapping the surroundings has become easier than ever. For those new to Lidar, this offers numerous chances, yet demands a deep understanding of point cloud data. It has a wide range of applications, especially in the architecture, engineering, and construction (AEC) sector. In this blog post, we will provide you with a simple guide to create and colorize point cloud data, providing you with the necessary start-up information.
What is a point cloud and point cloud scanning?
What is a point cloud?
A point cloud is a collection of 3D points captured from multiple angles in a 360-degree field of view. These points are recorded in a digital format, allowing them to be processed and analyzed in a variety of ways. Point clouds are commonly used in applications such as robotics, forestry, and architecture, where detailed 3D models of objects or scenes need to be created.

What is point cloud scanning?
Point cloud scanning involves capturing point cloud data with a LiDAR scanner or other similar equipment. This equipment emits laser pulses that bounce off objects, returning echoes used to calculate distance, shape, and surface characteristics. The result is a collection of 3D points, which can be processed to create a 3D model. Besides, tripod-based static LiDAR and LiDAR-enabled smartphones can also generate a point cloud at speed.
How to create point cloud data with a LiDAR scanner?
Creating point cloud data with a LiDAR scanner is relatively straightforward. Here are the basic steps involved:
Step 1: Choose the right LiDAR scanner
Before starting any point cloud data creation, you need to choose the right LiDAR scanner for your project. Consider factors such as the scan range, resolution, and frame rate when selecting a LiDAR scanner. You may also want to consider its compatibility with your operating system and point cloud processing software.
Step 2: Set up the LiDAR scanner
Once you have chosen your LiDAR scanner, set it up according to the manufacturer's instructions. This may involve connecting it to your computer, calibrating it, and setting up the scanning parameters. Make sure to follow the safety guidelines provided by the manufacturer during the setup process.
Step 3: Capture point cloud data
With the LiDAR scanner set up, you can now capture point cloud data. Move the LiDAR scanner around the area to capture data at regular intervals from multiple angles to avoid gaps in the point cloud.
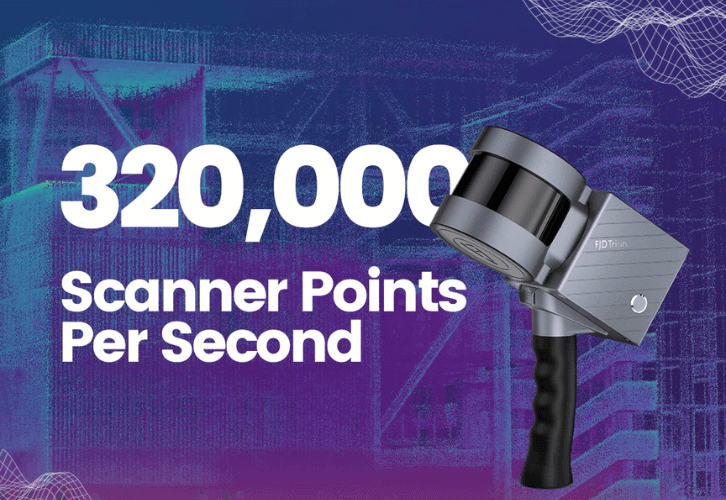
LiDAR scanners capture hundreds of thousands of points per second. Then it produces detailed point clouds in tripod-based static scanning (TLS) or mobile LiDAR scanning. The advantage of mobile LiDAR scanning is that it is more efficient than a static one. That is because there is no need to change stations during operation and for registration at each station when processing. Post-processing is required to merge datasets into a single accurate point cloud in either method.
How to colorize the data via point cloud processing software?
Colorizing point cloud data is a great way to give the data a more visually appealing appearance. Here are the basic steps involved in colorizing point cloud data using point cloud processing software:
Step 1: Choose the right point cloud processing software
Before you start adding color to your point clouds, it's important to choose the right software to process them. Consider the compatibility with your operating system, customization level, and output quality.
Step 2: Import the point cloud data into the software
Import point cloud data into point cloud processing software. Most software will allow you to import the data in various file formats, including LiDAR point files and image stacks.

Step 3: Adjust the color settings of point cloud data
Adjust the color settings in the point cloud processing software to achieve the desired look. You can change the color palette, adjust the color intensity, and even add custom colors to the point cloud data.
Step 4: Export the colorized point cloud data
Export the colored point cloud data to a file format that is compatible with your application. Most point cloud processing software will allow you to export the data in various file formats, including LAZ, LAS, PLY, and TXT.
For the most accurate colorization, combine images and data using a camera attachment with a LiDAR scanner. For example, FJD Trion P1 3D Handheld LiDAR Scanner collects the point cloud, and the camera attachment collects the image. Then input both data into the Trion Model Software, and the color of the image is assigned to the point cloud through algorithms, forming a true color point cloud.
Conclusion
To sum up, adhering to the procedures highlighted above will assist you in creating accurate and visually appealing 3D models of various objects and scenes. Point cloud data has numerous applications in different industries. Thus, it is an essential tool for professionals and researchers. With this understanding, we encourage you to embrace 3D LiDAR scanning technology. Generating point clouds is not only straightforward but accessible to everyone now!

